Set up a small practice sampler
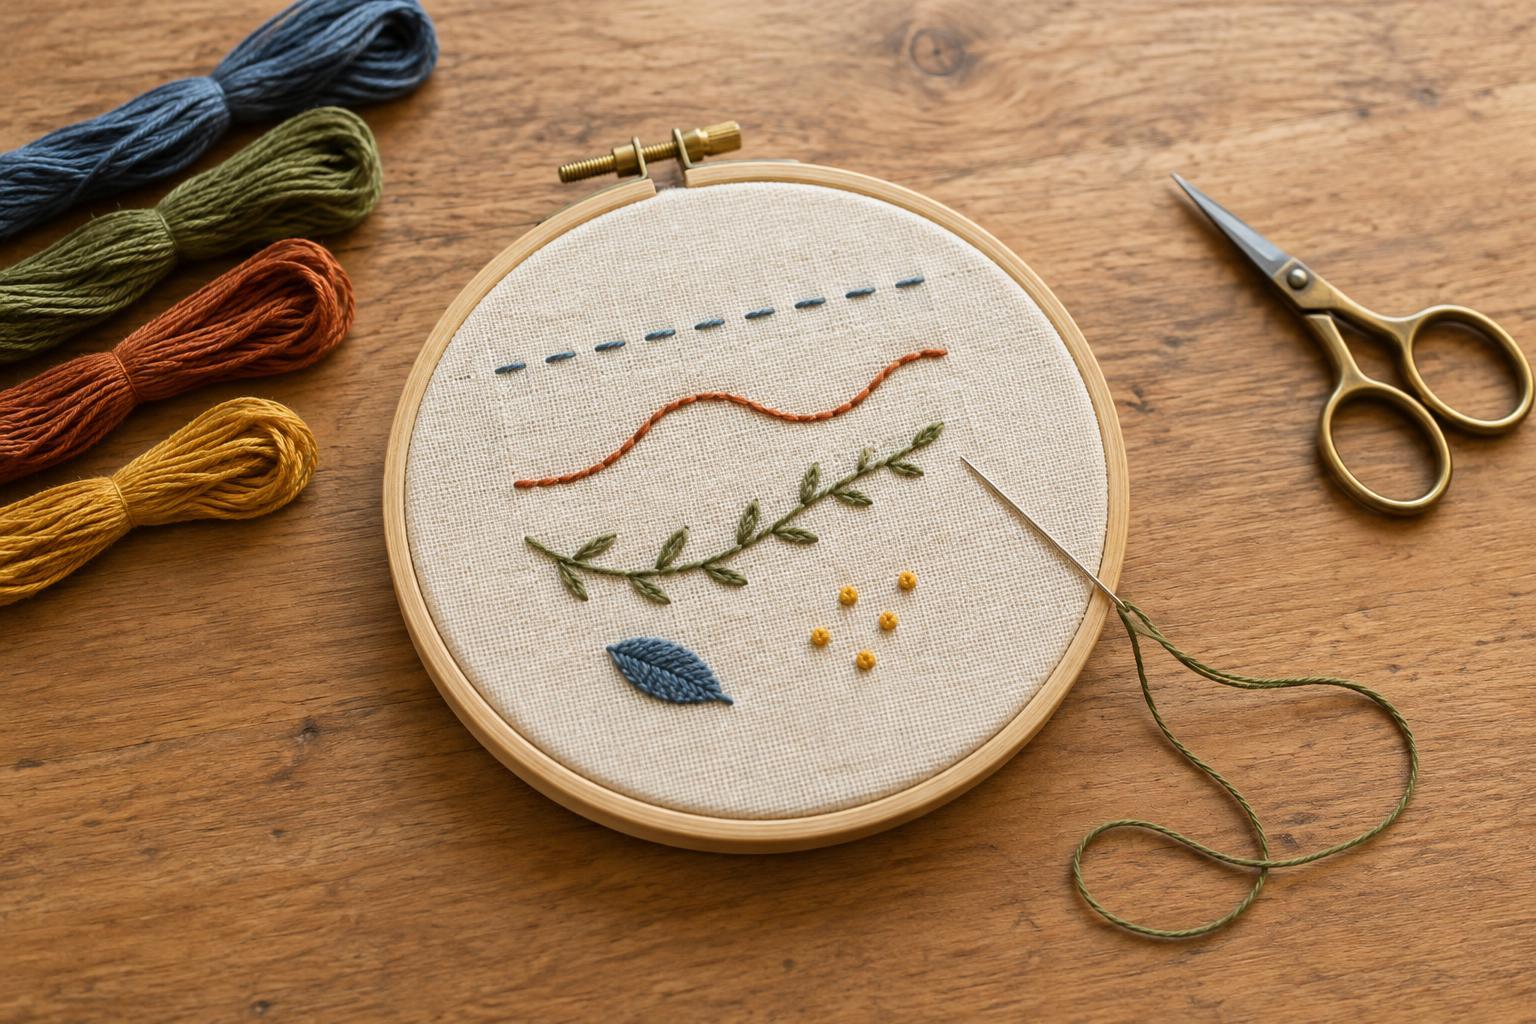
A practice sampler gives you room to learn without worrying about a finished design. Start with a piece of plain, tightly woven cotton, an embroidery hoop, an embroidery needle and a few colors of embroidery floss. Cut the fabric larger than the hoop so you have enough to grip while tightening it. Place it in the hoop with the fabric smooth and comfortably taut, not stretched out of shape.
Draw a few short straight lines, a gentle curve, a small leaf and several dots with a washable fabric marker. If you do not have one, you can practice freehand instead. Embroidery floss is made of strands that can be separated; two or three strands are manageable for many small practice stitches. Cut a comfortable working length rather than a very long one, which is more likely to tangle. These five stitches will give each part of your sampler a purpose.
1. Running stitch: learn a steady rhythm
Running stitch is a line of small dashes with spaces between them. Bring the needle up through the fabric, move a short distance along your marked line and take it down. Bring it up again a similar distance away. Repeat, aiming for roughly even stitches and gaps. On a straight line, you may be able to weave the needle in and out of the fabric several times before pulling the thread through.
This stitch works well for light outlines, dashed borders and simple decorative trails. Do not pull so hard that the fabric puckers. If your dashes vary in size, keep going: the sampler is there to help your hands learn a rhythm, not to prove they can already make perfect marks.
2. Backstitch: make a continuous outline
Backstitch creates a solid-looking line and is useful for lettering, geometric shapes and clear outlines. Bring the needle up one stitch length ahead of the start of your line, then take it down at the start. Bring it up another stitch length ahead of the point where you first came up. Take it down into that previous point, closing the gap. Continue by moving forward underneath the fabric and backward on its surface.
Try backstitch on a gentle curve after practicing a straight line. Shorter stitches make it easier to follow bends without a jagged appearance. Let the thread lie on the surface without yanking it tight; a smooth line depends as much on gentle tension as on placement.
3. Stem stitch: follow a flowing curve
Stem stitch makes a slightly twisted line that suits stems, vines and curved outlines. Bring the needle up at the start of a line and insert it a stitch length ahead. Before pulling the thread all the way through, bring the needle back up about halfway between those points, keeping the loose working thread to the same side of the needle each time. Pull gently to settle the stitch, then repeat along the line.
Keeping the working thread consistently on one side gives the line its rope-like appearance. If the twist suddenly changes direction, check which side the thread is resting on before making the next stitch. A broad, easy curve is a better first exercise than a tight spiral.
4. Satin stitch: fill a small shape
Satin stitch uses closely placed straight stitches to cover an area. Practice on your small leaf: bring the needle up at one edge and take it down at the opposite edge. Bring it up beside your first starting point and cross the shape again. Work from one end of the leaf to the other, placing stitches close enough to hide the fabric without piling them on top of one another.
Keep the first shape narrow. Long stitches can loosen or snag more easily, while a small leaf lets you focus on smooth coverage. Follow the shape’s edges as you go rather than making every stitch the same length. If a gap appears, add a stitch instead of tightening the surrounding ones.
5. French knot: add a raised detail
French knots make tiny raised dots for flower centers, seeds or scattered texture. Bring the needle up where you want the dot. Hold the working thread gently in your other hand and wrap it around the needle once or twice. Insert the needle back into the fabric very close to, but not directly through, the hole where it came up. Keep light tension on the thread as you pull the needle through so the wraps settle into a knot.
These knots often take a few attempts. If one slips through the fabric, leave a slightly larger gap between the entry and exit holes next time. Finish your sampler by adding a handful of knots near your stitched leaf. Together, the five stitches let you make a simple design with dashed marks, firm outlines, curved lines, filled shapes and texture.