Start with a sheet and a small idea
A one-sheet zine is a tiny booklet made by folding a single piece of paper and cutting one short slit. It has eight small pages, including a front and back cover. You do not need a printer or special binding supplies: ordinary printer paper, a pencil, and scissors are enough to make your first one.
The limited space is part of the appeal. Choose a subject you can explore in brief pieces rather than trying to fit in everything you know. You might make a field guide to plants in your neighborhood, a collection of quick sketches, a tiny recipe book, or a story told in six scenes. For a first attempt, use a blank sheet as a practice copy. It is easier to understand the page layout after you have folded a booklet once.
Fold a blank eight-page booklet
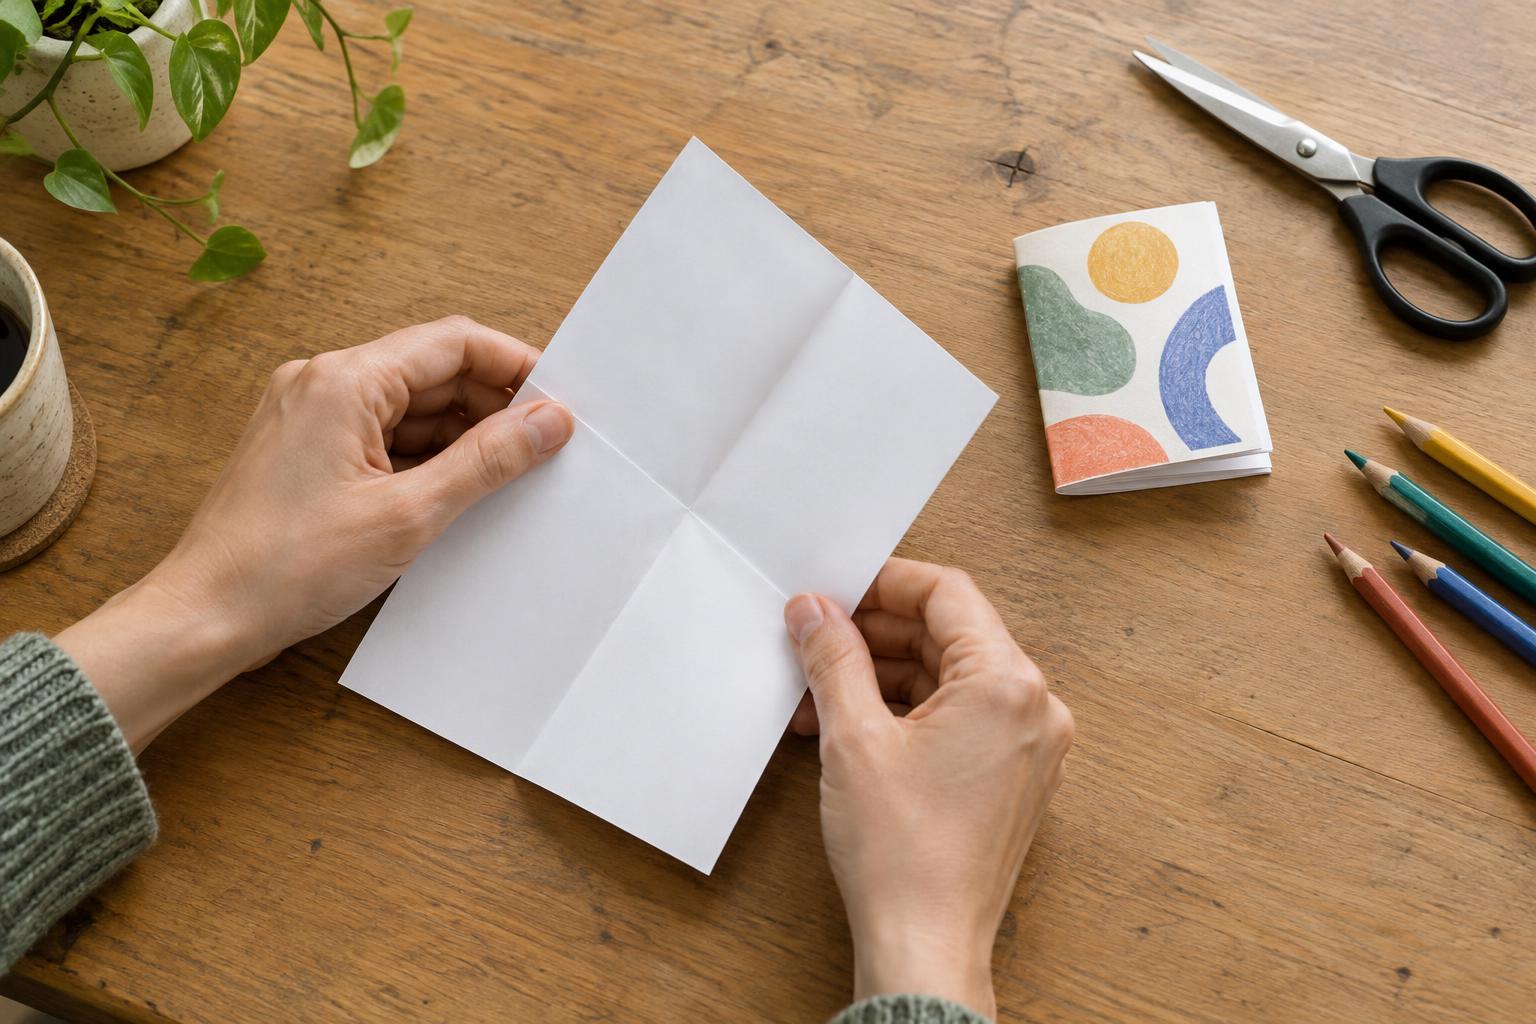
Place the paper in front of you horizontally, with its long edges at the top and bottom. Fold the top edge down to meet the bottom edge, crease it, and open the sheet. Next, fold the left edge over to meet the right edge, crease it, and open it again. Bring the left edge to the vertical center crease and make a fold; repeat with the right edge. When you open the sheet, you should see eight equal rectangles: four across and two down.
Find the horizontal crease running through the middle of the paper. Cut along that crease only between the two innermost vertical fold lines. In other words, the slit passes through the middle two columns, not all the way to either edge. If you prefer to use scissors without starting in the middle of a flat sheet, fold the paper in half from left to right first. Cut from that folded edge along the horizontal crease, stopping at the next vertical crease, then open it.
Fold the sheet in half again with the top edge meeting the bottom edge. Hold the short ends of this long strip and gently push them toward each other. The slit should open into a diamond and then a cross shape. Bring the panels together and fold them around one another until you have a booklet. If the paper resists, open it and sharpen the creases rather than pulling on the cut.
Plan the pages before adding artwork
Page order can be surprising when the booklet is unfolded: some panels face different directions. The simplest way to avoid a misplaced cover or upside-down drawing is to number your folded practice booklet from front to back. Add a small arrow pointing toward the top of every page. Then unfold it and use those numbers and arrows as a map for your finished sheet.
Give each page one job. The cover can introduce the subject; the next page can set the scene or explain how to use the zine. Save the middle pages for your main images, instructions, or story, and let the back cover carry a final thought. Sketch lightly first. Keep words and important details away from fold lines and the slit, where they may be hard to see once the zine is assembled.
Make the small format work for you
A zine does not need polished drawings. Bold shapes, handwritten headings, simple diagrams, cut-paper collage, or repeated patterns can all work well. Try limiting yourself to one or two colors, especially if you plan to copy it. Short captions are often easier to read than dense paragraphs on these small pages. Leave some empty space so each spread feels deliberate rather than crowded.
You can also use the folds as part of the idea. A walking zine might reveal one thing to notice on each page. A mini cookbook could put one step of a simple process on each page. If you want someone to write or draw in it, leave a page blank and add a prompt. There is no requirement to fill every panel.
Check it, then share it
Once the artwork is complete, fold the zine again and read it from beginning to end. Check that every page is upright, the sequence makes sense, and nothing essential disappears into a crease. If you want copies, flatten the finished design and copy the sheet at its original size. Cut and fold each copy the same way as the practice booklet.
Small imperfections are easy to accept in a handmade zine; they can make each copy feel personal. Give one to a friend, leave a few at a gathering where sharing is welcome, or keep a series for yourself. After making one, you can reuse the folding method for new subjects and spend your time experimenting with what eight little pages can say.