Start with the joint, not the caulk tube
Caulk makes a flexible seal where two surfaces meet, such as a bathtub and wall or a sink and countertop. Before replacing it, look at the whole joint. If the fixture shifts, the surrounding surface is loose, or water has damaged material behind the edge, a fresh bead may hide the problem without fixing it. Address the movement or damage first. Also, do not cover any opening designed to let water drain.
Choose a caulk labeled for the surfaces and wet-area use. Many bathroom jobs call for a flexible silicone sealant, but check the product label: some materials need a specific formulation or primer, and not every caulk can be painted. Pick a color you can live with, since a clear bead can still show dirt or an uneven edge beneath it. Gather a caulk gun if needed, a scraper or removal tool, clean cloths, painter’s tape, and the cleaning supplies recommended for your surfaces.
Remove the old bead and clean the gap
Applying new caulk over a failing bead usually gives it a poor surface to grip. Carefully cut along both sides of the old caulk, then lift and pull away as much as possible. Work slowly near acrylic tubs, finished countertops and other surfaces that scratch easily. A plastic scraper may be gentler than a metal blade. If residue remains, use a remover only if its directions say it is suitable for the surrounding materials.
Clean away soap film, grease and loose particles, then rinse or wipe as the cleaning product directs. Let the joint dry thoroughly, including the gap itself. Moisture trapped under new caulk can interfere with adhesion. If you find persistent dampness or staining that returns after cleaning, investigate the source rather than sealing over it. Ventilate the room while using cleaners and caulk, and avoid mixing cleaning products.
Set up for a controlled bead
Check the caulk label for its recommended joint width and application conditions. If the gap is unusually wide or deep, a bead alone may not fill it reliably; a suitable foam backer rod can support the caulk in some joints. Do not pack material into a gap without first checking what the opening is for. If you are unsure whether a large gap reflects fixture movement or a missing trim piece, pause and identify the cause.
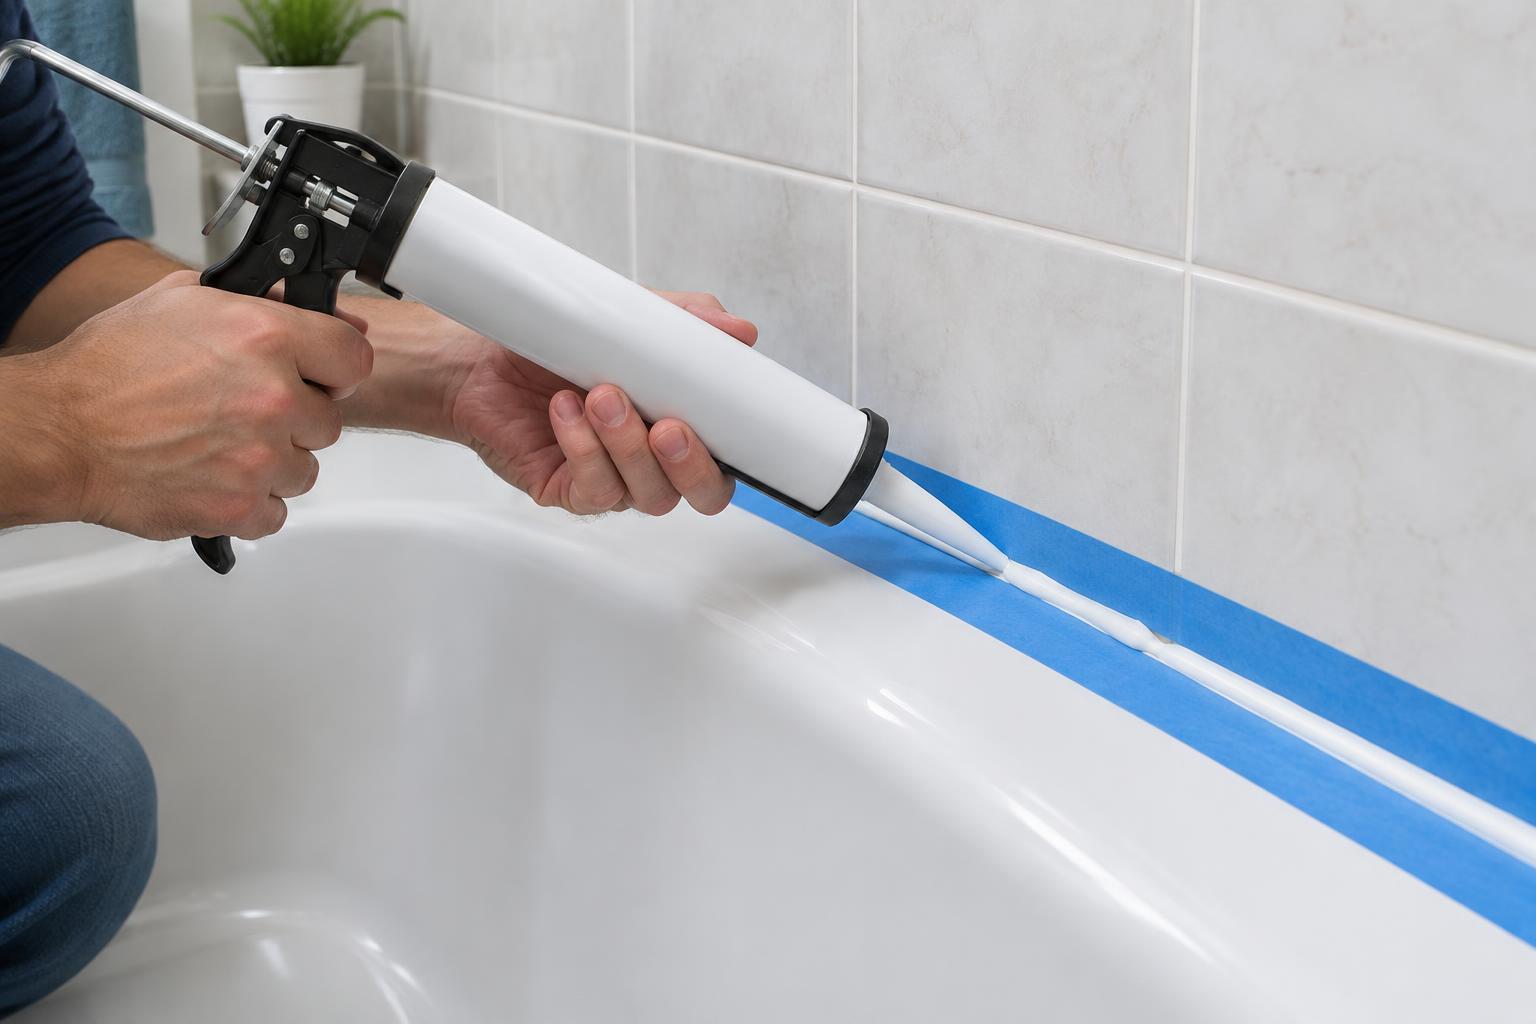
For a tidier edge, place painter’s tape along both sides of the joint, leaving only the area you want sealed exposed. Press the tape down firmly, particularly around curves. Cut the nozzle at a small angle to make an opening slightly narrower than the bead you expect to need. A small opening is easier to control than a large one. If the tube has an inner seal, puncture it as its instructions direct, then test the flow on a scrap of cardboard.
Apply, smooth and remove the tape
Hold the nozzle close to the gap and move at a steady pace, applying enough caulk to contact both surfaces without piling it on. You can push or pull the nozzle depending on which gives you better control. For a long bathtub edge, work in manageable stretches while keeping the bead continuous where the sections meet. Release pressure on the gun when you stop so excess caulk does not keep flowing.
Smooth the bead before it starts to skin over, following the product’s directions. A caulk-finishing tool or a suitable gloved finger can press the material into the joint and remove excess. Aim for a simple, slightly concave line rather than repeatedly working the same spot. If you used tape, pull it away while the caulk is still workable, at an angle away from the new bead. Touch up any raised edge lightly, then leave the joint alone.
Let it cure before getting it wet
Dry-to-touch and ready-for-water are not always the same thing. Follow the curing time on your particular product, and avoid using the tub or splashing the sink joint until the label says it is ready. Temperature, humidity and bead size can affect curing, so allow extra time if conditions are outside the product’s recommended range. Keep the room ventilated as directed while the caulk cures.
Afterward, check that the bead is attached along both edges and has no obvious skips. Keep the area clean with products compatible with the caulk and surrounding surfaces, and avoid scraping it during routine cleaning. If it soon pulls away, the likely issue may be lingering residue, moisture, movement or an unsuitable product. Finding that cause will do more good than adding another layer on top.