What makes quick bread quick
Quick breads rise with baking powder or baking soda rather than yeast, so there is no dough to knead and no long rise to wait for. The trade-off is that the batter needs a gentle hand. Stir flour with liquid for too long, and the finished loaf can become firm or chewy instead of tender. For a first attempt, aim for a batter that is combined, not perfectly smooth.
This lightly sweet vanilla loaf uses baking powder, which makes the method straightforward. You can eat it plain, toasted, or with a little butter. Make it once without additions to learn what the batter looks like; then try a small handful of nuts or dried fruit on another day.
Gather ingredients and prepare the pan
For one loaf, you’ll need 2 cups all-purpose flour, 1/2 cup sugar, 2 teaspoons baking powder, and 1/2 teaspoon salt. The wet ingredients are 1 cup milk, 1/3 cup neutral oil, 1 large egg, and 1 teaspoon vanilla extract. If using measuring cups, spoon the flour into the cup and level it off rather than scooping directly from the bag, which can pack in extra flour.
Heat the oven to 350°F (175°C). Grease an 8½-by-4½-inch loaf pan, or line it with parchment, leaving enough overhang to lift the loaf out later. Set out two mixing bowls, a whisk, and a spatula. Having the pan and oven ready before you combine the batter lets you bake it promptly.
Mix until the flour disappears—then stop
In the larger bowl, whisk the flour, sugar, baking powder, and salt until they look evenly distributed. In the second bowl, whisk the milk, oil, egg, and vanilla until the egg is fully broken up. Pour the wet mixture into the dry mixture all at once.
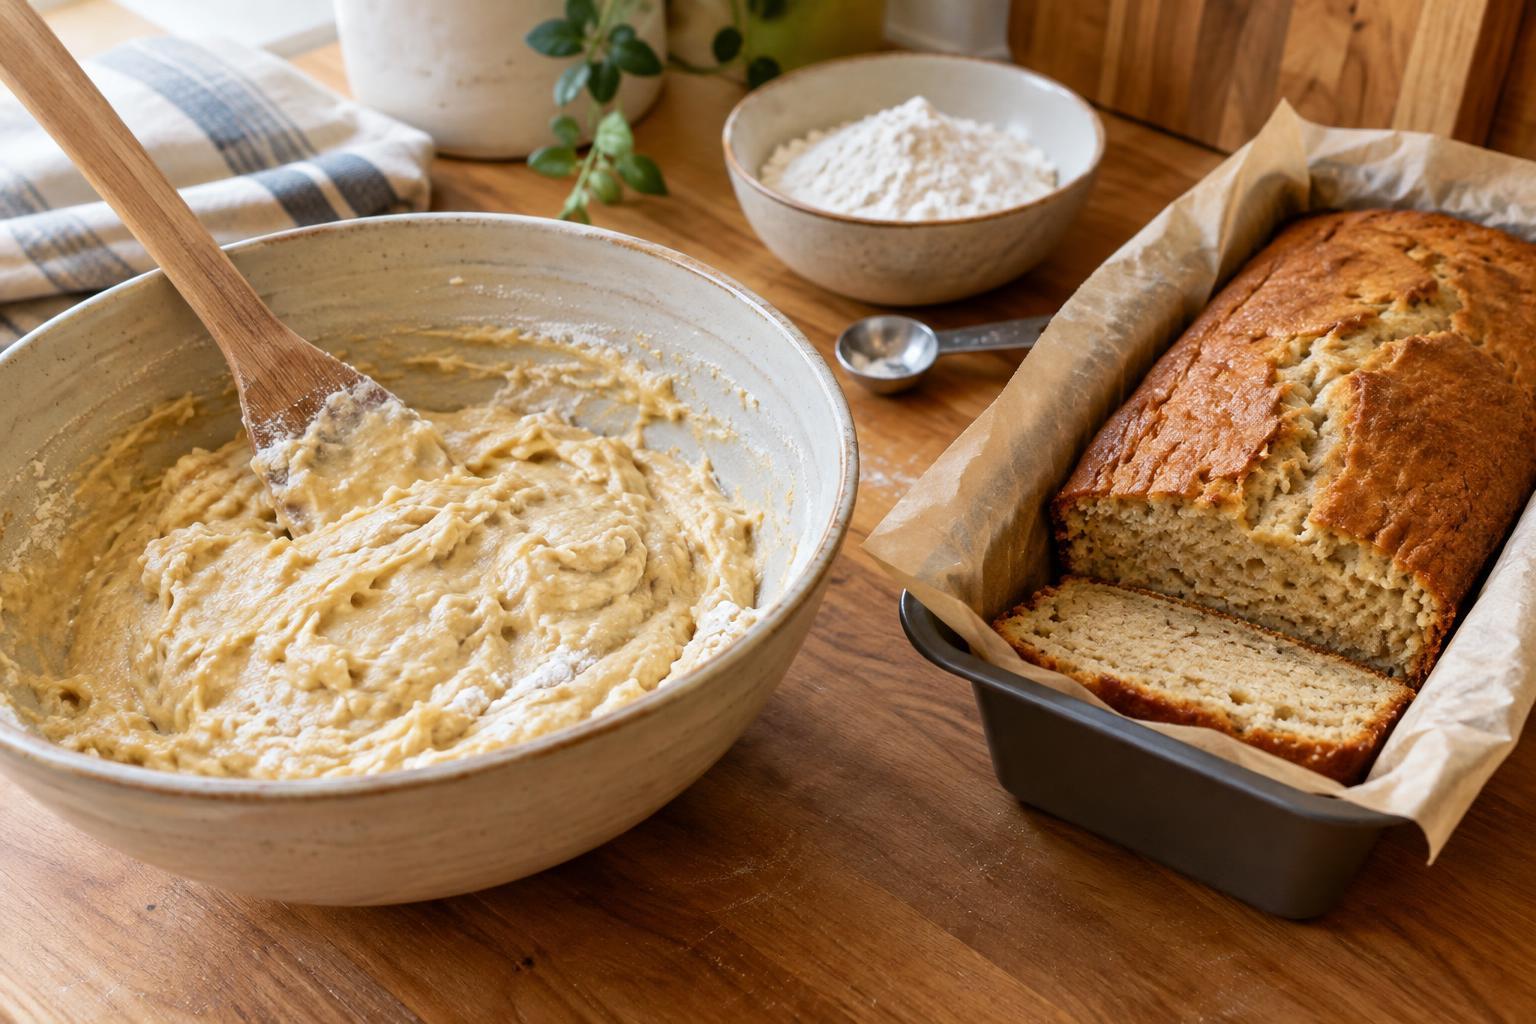
Use the spatula to scrape down the sides and fold the batter: draw the spatula along the bottom of the bowl, lift some batter over the top, and turn the bowl slightly. Repeat only until you can no longer see patches of dry flour. The batter will be thick and may have small lumps. Those lumps are less of a problem than continuing to stir in pursuit of a smooth surface.
Scrape the batter into the prepared pan and spread it gently so it reaches the corners. Avoid tapping the pan repeatedly or working the surface until it looks flawless. A roughly level top is enough.
Bake, check, and cool
Bake on a center oven rack for about 45 to 55 minutes. Ovens and pans vary, so begin checking near the earlier end of that range. The top should be golden and feel set, and a toothpick inserted into the center should come out without wet batter. A few moist crumbs are fine. If the top is browning before the center is done, lay a piece of foil loosely over it for the remaining bake time.
Let the loaf cool in its pan for about 10 to 15 minutes, then move it to a rack. Cutting immediately can make a warm loaf seem gummy and cause it to crumble. Once it has cooled, slice it with a serrated knife. Keep leftovers covered at room temperature for a couple of days, or freeze individual slices in a sealed container for longer storage.
Learn from the first loaf
A crack along the top is normal: the outside sets while the center is still expanding. Large tunnels through the loaf or a tough texture can be signs of overmixing. Next time, fold more slowly and stop as soon as the last visible flour streak disappears. A dry loaf may have baked too long or contained more flour than intended; check it earlier and measure the flour lightly.
Once the plain version feels familiar, fold in up to 1/2 cup of chopped nuts or dried fruit with the final few strokes. Additions give you another reason to keep those strokes brief. The goal is not an immaculate batter or an identical loaf every time. It is a repeatable method: prepare first, combine wet and dry ingredients gently, and let the oven do the rest.