Start by looking at the light
Shading is less about filling an outline and more about showing which surfaces face the light. Set a plain object, such as a mug or a ball, on a table and light it from one side with a lamp. Keep the lamp and object in place while you draw. A single, steady light source makes the pattern easier to understand than light coming from several directions.
Look for the brightest area on the object, the darker area turned away from the lamp and the shadow the object throws onto the table. That last shape is called the cast shadow. Before drawing details, squint at the setup. Squinting softens small distractions and can make the broad light and dark areas easier to see. Your first goal is to place those large areas, not to copy every subtle change.
Gather a few tools and make a value scale
You can begin with ordinary drawing paper, an HB pencil, a softer pencil such as a 2B, and an eraser. An HB pencil is useful for light outlines and middle tones; a softer pencil can help with darker areas. You do not need a full set of pencils. Work on a spare sheet beneath your drawing hand if you tend to smudge the page.
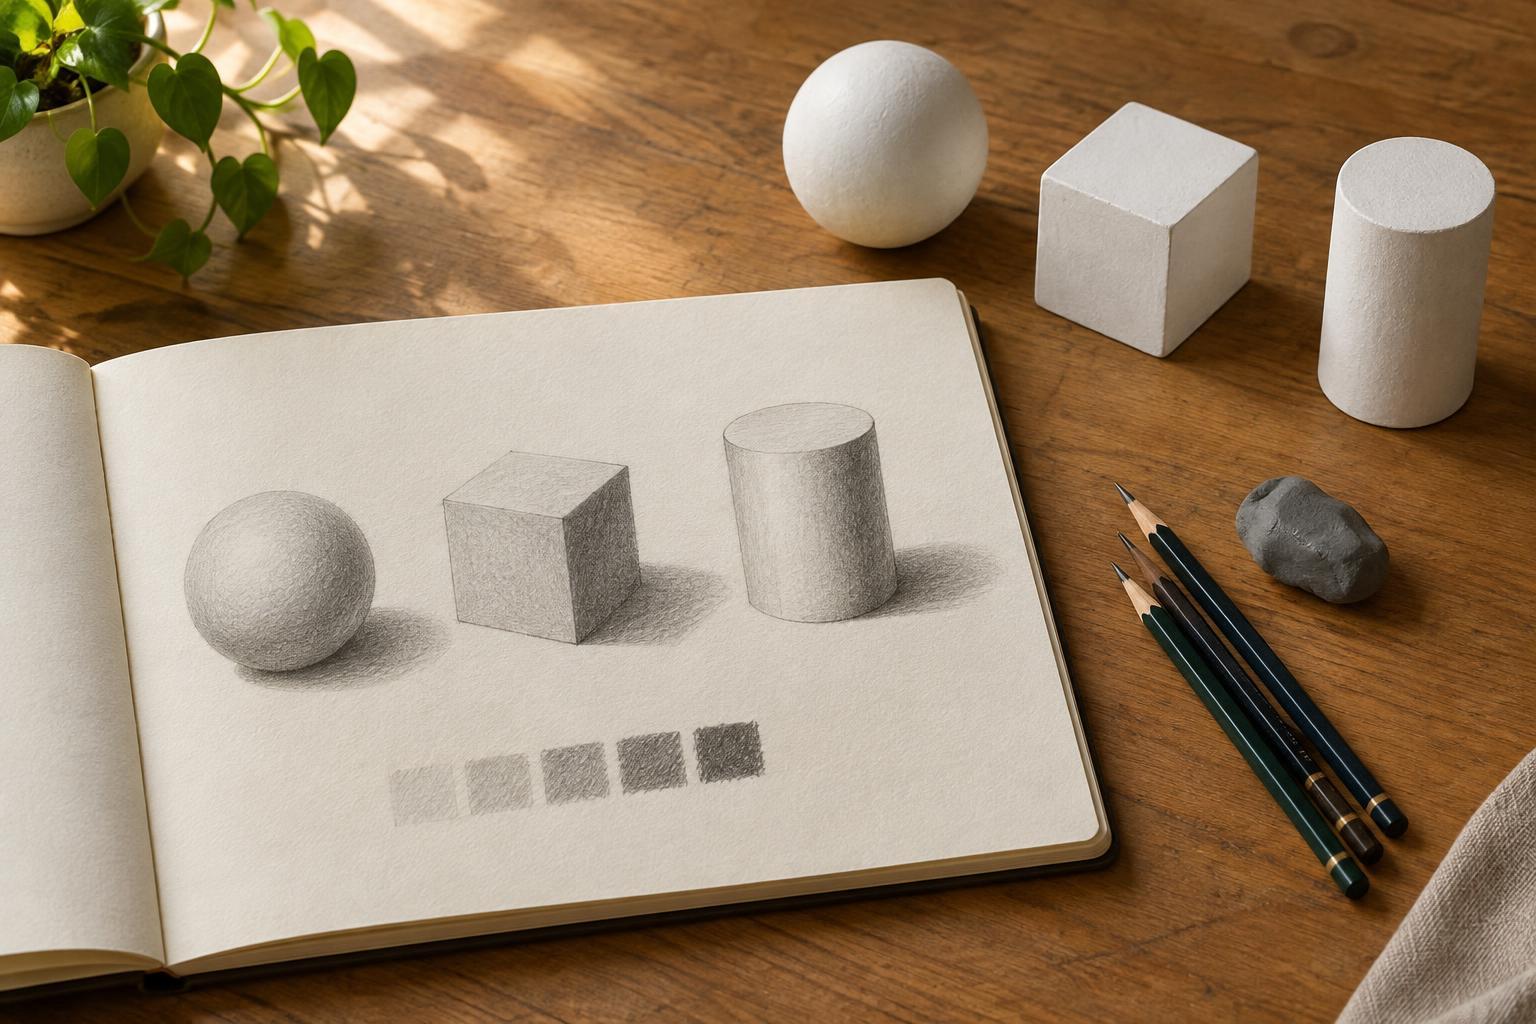
Before shading an object, draw a row of five small boxes. Leave the first box white and shade the last as dark as you comfortably can. Fill the boxes between them with steps that get progressively darker. This is a value scale: a quick reference for the range of light and dark in your drawing. Try building each tone with several light passes rather than one hard stroke. Heavy pressure can dent the paper and make a dark area difficult to change.
Notice, too, that a shaded patch may look different beside a white patch than it does beside a dark one. Compare tones across the whole drawing rather than judging each mark on its own.
Shade a sphere with gradual changes
Draw a simple circle and choose which side the light comes from. Leave a small area on that side nearly white for the highlight. Add a light middle tone across much of the sphere, then gradually darken the side facing away from the light. On a rounded form, these changes usually flow into one another rather than stopping at a sharp line.
The darkest part of the sphere may sit in a band on its shaded side, called the core shadow. The very edge can sometimes appear a little lighter if light bounces onto it from the table or nearby surfaces. Keep that reflected light subtle; if it becomes as bright as the highlight, the sphere may lose its sense of shape. Beneath the sphere, draw the cast shadow. It often looks darkest close to where the sphere touches the table, then becomes less distinct farther away.
Step back occasionally to check whether the sphere reads as round. If it looks flat, strengthen the difference between its light and dark sides before adding more texture.
Try a cube and a cylinder
A cube shows how shading changes when surfaces have clear edges. Sketch a box with a top and two visible sides. Imagine the same lamp lighting all three planes. Give each plane a distinct value: perhaps a light top, a middle-tone side and a darker side turned away from the lamp. Keep the boundary between planes crisp. A cast shadow beside the cube can help anchor it to the surface.
A cylinder combines the cube’s straight structure with the sphere’s gradual shading. Draw two roughly parallel sides and curved ends, like a simple can. Shade across its curved wall from light to dark, keeping the strokes fairly even. Depending on the light’s position, one edge may be darker than the other. These exercises teach a useful distinction: a change in tone can describe either a firm corner or a surface that curves away.
Build a repeatable practice habit
For a short practice session, draw one sphere, one cube and one cylinder under the same imagined light source. Mark the light direction with a small arrow outside each drawing. Begin with faint outlines, block in the largest shadow shapes, add middle tones and save the darkest marks for last. This order leaves room to adjust if you notice that a shadow is misplaced.
Use the eraser to lift a highlight or soften an area that has grown too dark, rather than trying to make every tone perfect on the first pass. If your shading looks patchy, try overlapping light strokes and keeping your hand pressure consistent. If the forms seem to float, check that their cast shadows connect convincingly to the surface beneath them. Repeat the exercise with a real object when you can: observation will show you variations that a memorized shading pattern might miss.